Tutorial
InstructionsInstructions - You can also view our video tutorials at https://youtu.be/0pVzl9-BIZs and https://youtu.be/uuyyXAehqW0.
Our Automated Bank Reconciliation Software lets you compare two sets of data in order to reconciliate them. Here we assume that you are familiar with a bank reconciliation or an account reconciliation process. If not you should familiarize yourself with this process and come back when ready.
Once you log in, you get to the Existing company list page.
If you are a first time user you will not have any existing companies in the list so you will need to create a new company by clicking on New Reconciliation

This is the New Reconciliation Window.
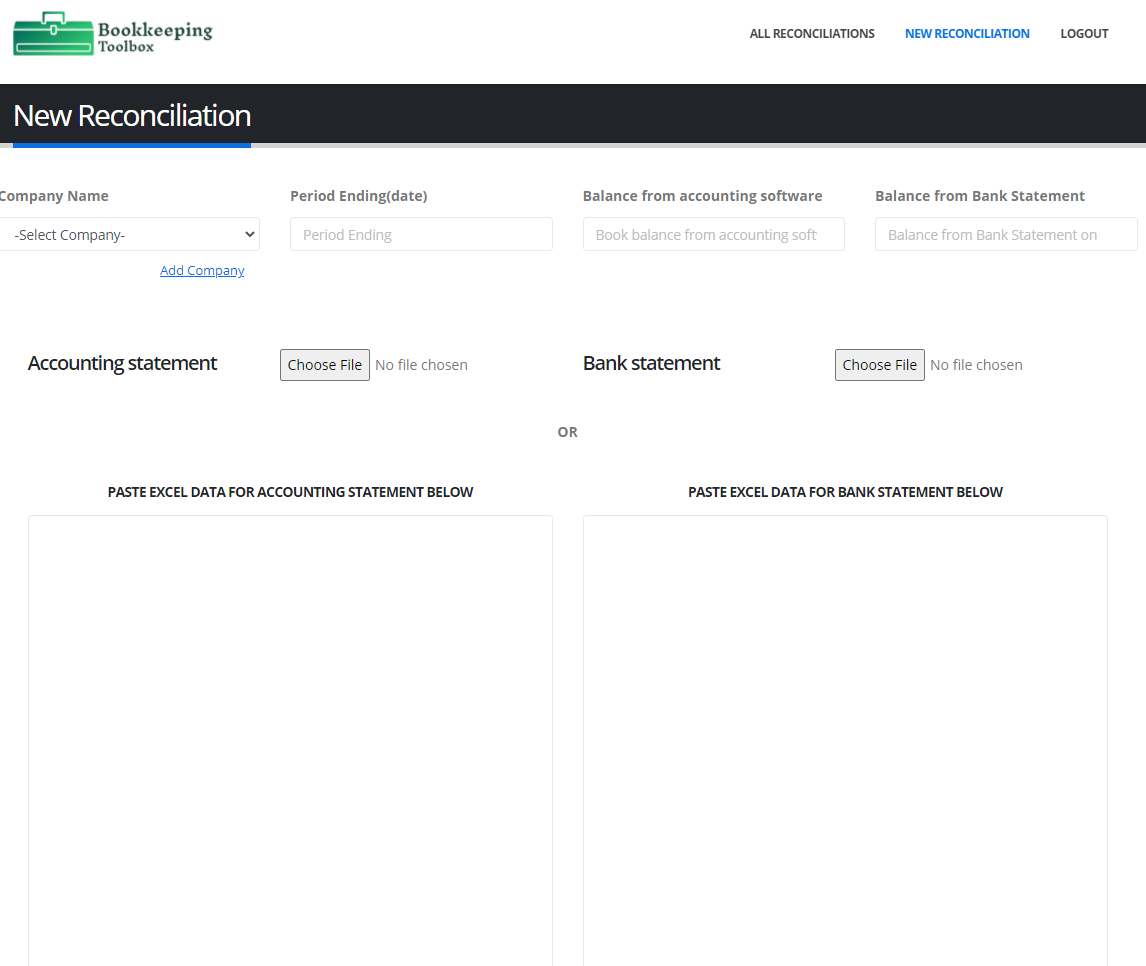
Add a company by clicking on the add company link. You will be prompted to add a company name and click add when finished.
Period ending: Select the date of the end of the reconciliation period, ex. 03/31/2020 (format is MM/DD/YYYY) or select from calendar.
Balance from accounting software: enter the amount at the end of the period in your accounting software
Balance from Bank Statement: enter the amount at the end of the period in on your bank statement
Accounting statement: You need to enter your entries from your reconciliation period from your accounting software, ex. March 2020 transactions in this case. There are 2 ways to enter your entries: By importing an excel file or by pasting the data in the PASTE EXCEL DATA FOR ACCOUNTING STATEMENT BELOW box.
Before importing your data, you need to prepare your data by exporting it from your accounting software and exporting it from your bank statement.
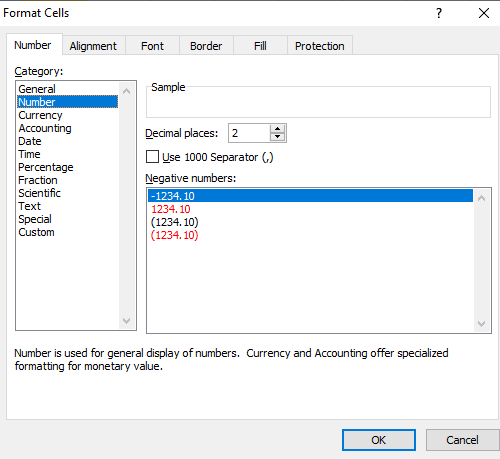
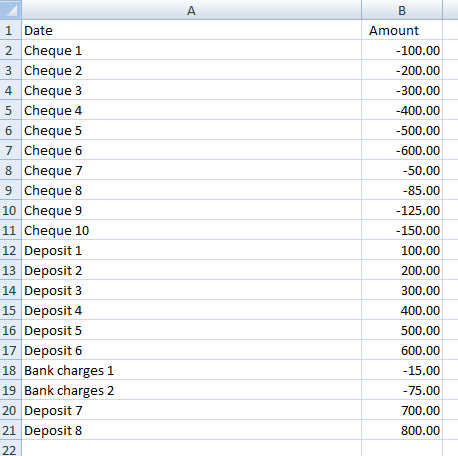
Importing an excel file: prepare your data in the following manner: export your accounting entries from your accounting software to excel. Our Automated Bank Reconciliation Software allows you to import or paste only two columns of data. I usually chose the description of the transaction (Supplier and cheque number that I merge together with the concatenate function) and the amount of the transaction. You need to merge the debits and credits into one column if your accounting software displays the transactions as debits and credits). Our Automated Bank Reconciliation Software will only match exact amounts without looking at other data such as check number or date. This feature might become available in a future version. Your file needs a header in the first row and data in the subsequent rows, see example below. Also your amounts need to be formatted as numbers, no 1000 separator and no () for negative number. This is very important as currency format or any other format will not work.
Example of an excel file ready to be imported:
Once the file is done, save it in a location where you can easily retrieve it, then click on choose and select the file you just created.

Your file is uploaded and is ready to be reconciliated.
Pasting the data in the PASTE EXCEL DATA FOR ACCOUNTING STATEMENT. This is a simpler and faster method than preparing an excel file, saving it, and choosing/uploading it. All you need to do is that once you have exported your accounting entries to excel (2 columns only) is to copy the data (no header row) in the PASTE EXCEL DATA FOR ACCOUNTING STATEMENT box:
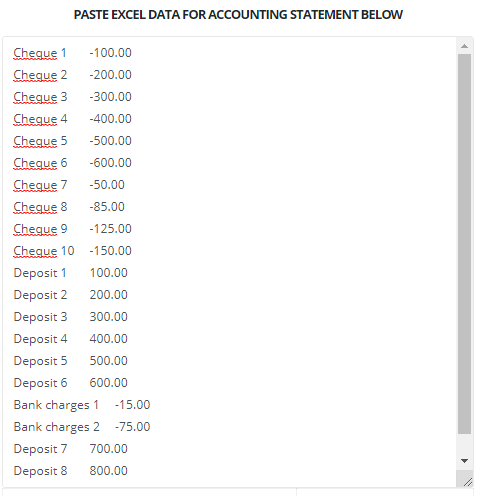
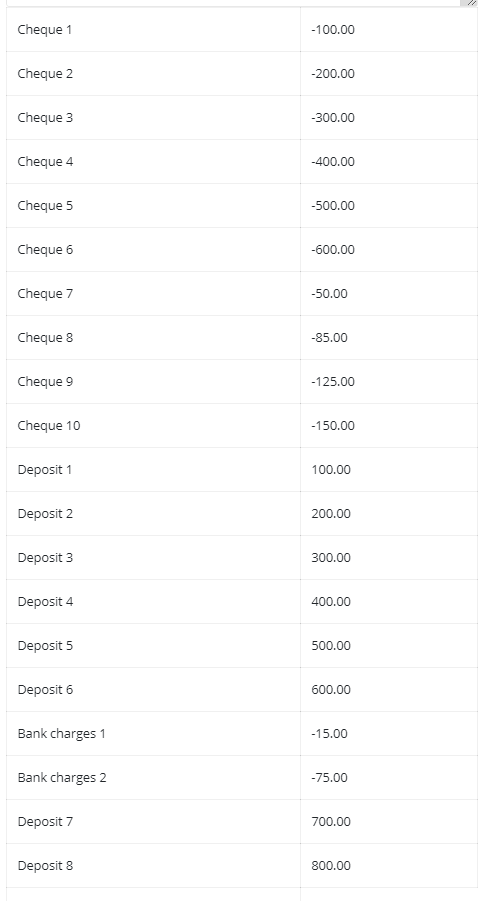
You will notice that this will create another box below with the data placed in separate boxes.
Bank statement: You need to enter your entries from your reconciliation period from your bank statement, ex. March 2020 transactions in this case. There are 2 ways to enter your entries: By importing an excel file or by pasting the data in the PASTE EXCEL DATA FOR BANK STATEMENT BELOW box, same process as for the accounting entries.
Importing an excel file: prepare your data in the following manner: export your bank entries from your bank provider to excel. Our Automated Bank Reconciliation Software allows you to import or paste only two columns of data. I usually chose the description of the transaction and the amount of the transaction. You need to merge the debits and credits into one column if your bank data displays the transactions as debits and credits). Our Automated Bank Reconciliation Software will only match exact amounts without looking at other data such as check number or date. This feature might become available in a future version. Your file needs a header in the first row and data in the subsequent rows, see example below. Also your amounts need to be formatted as numbers, no 1000 separator and no () for negative number. This is very important as currency format or any other format will not work.
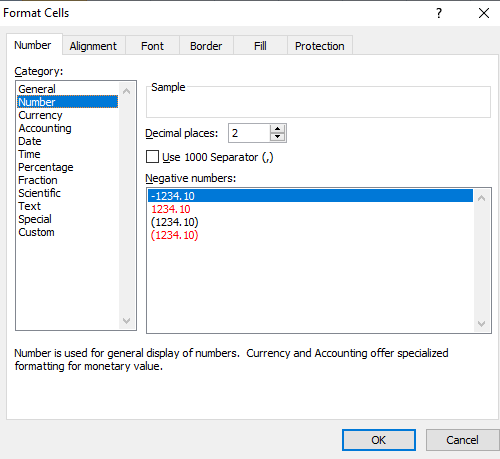
Example of an excel file ready to be imported:
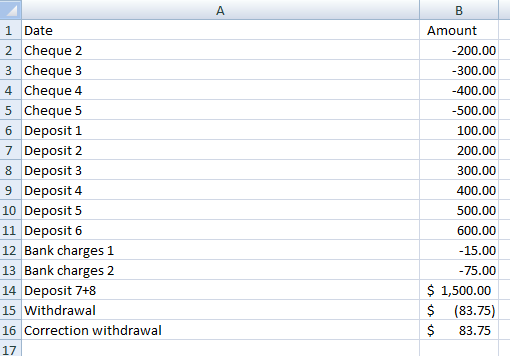
Once the file is done, save it in a location where you can easily retrieve it, then click on choose and select the file you just created. Your will is uploaded and ready to be reconciliated.
Pasting the data in the PASTE EXCEL DATA FOR BANK STATEMENT. This is a simpler and faster method than preparing an excel file, saving it, and choosing/uploading it. All you need to do is that once you have exported your bank entries to excel (2 columns only) is to copy the data (no header row) in the PASTE EXCEL DATA FOR BANK STATEMENT box:
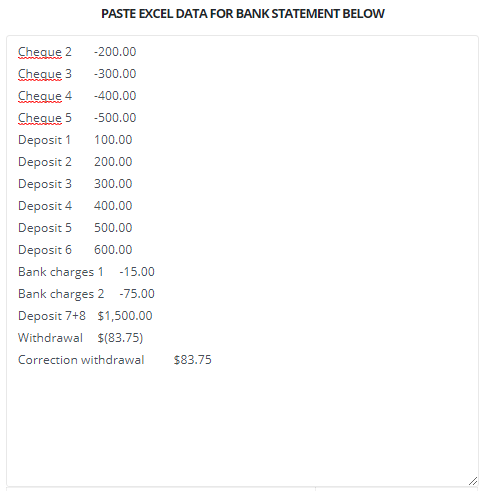
You will notice that this will create another box below with the data placed in separate boxes.
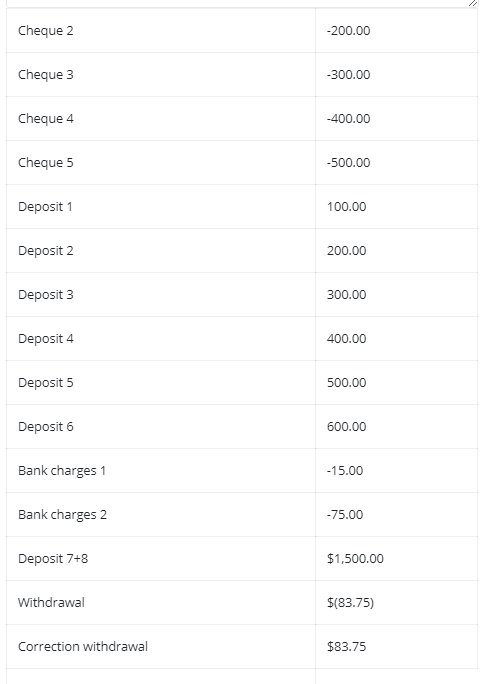
Once this is done click on the submit button, this will bring you to the view records page 
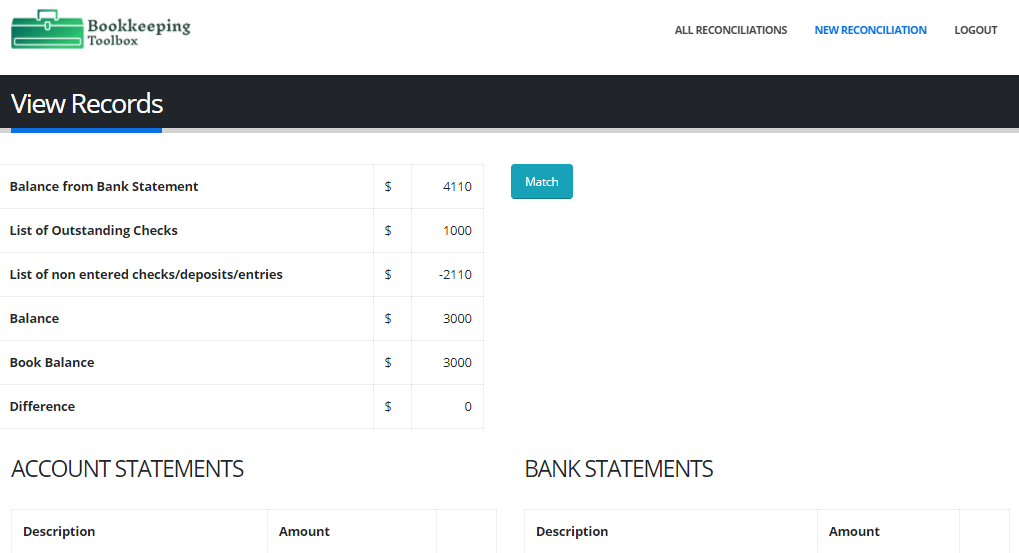
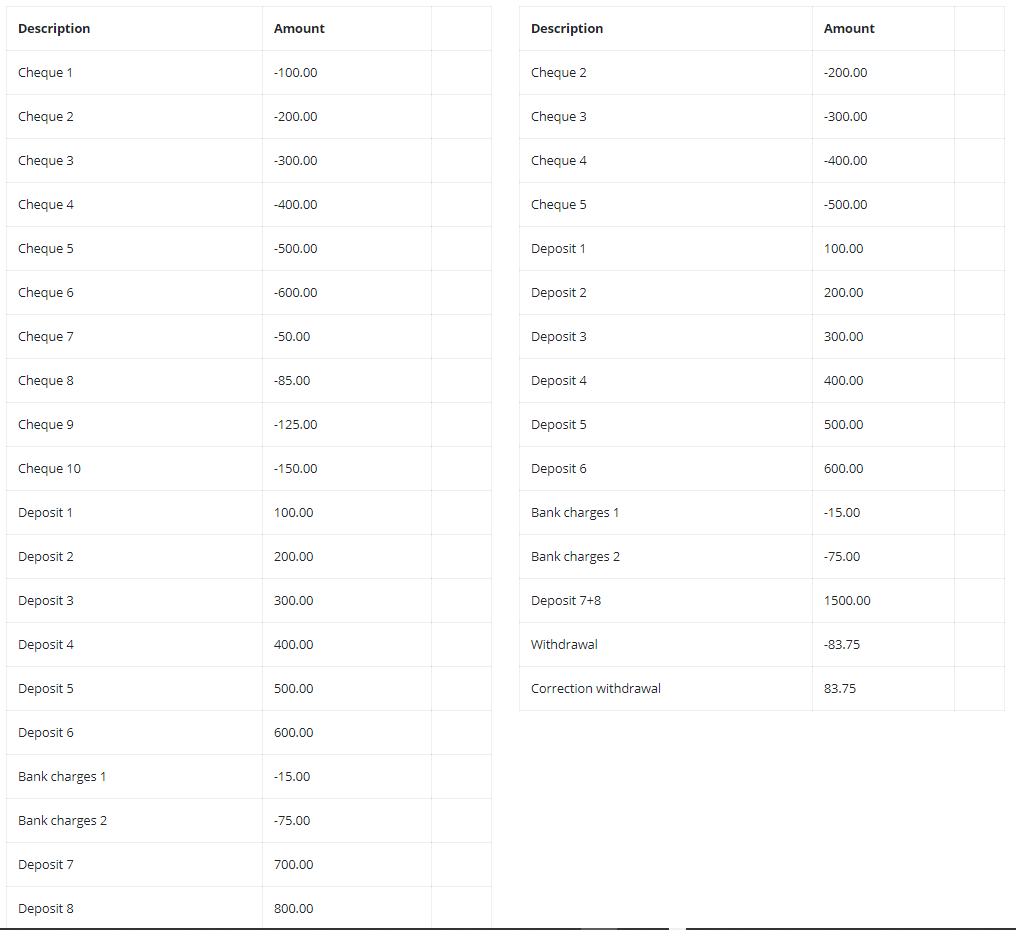
The view records page shows you the bank balance and book balance you entered on the previous page. It calculates the total of the transactions uploaded or pasted from you accounting software and bank provider. The difference box should equal zero, meaning that you will be able to do a reconciliation that balances. Otherwise if the difference is not zero, you have a difference that you need to resolve. Perhaps you made a mistake when you copied the data, perhaps you had some outstanding entries previously to March 2020 that you did not account for. In any case, I would suggest that you find the difference here before moving on since it will not go away. This is actually a nice feature so you don’t have to wait at the end of the reconciliation before finding out that you don’t balance and that you have a data entry or any other kind of error.
Your next step here is to click on the match button ![]()
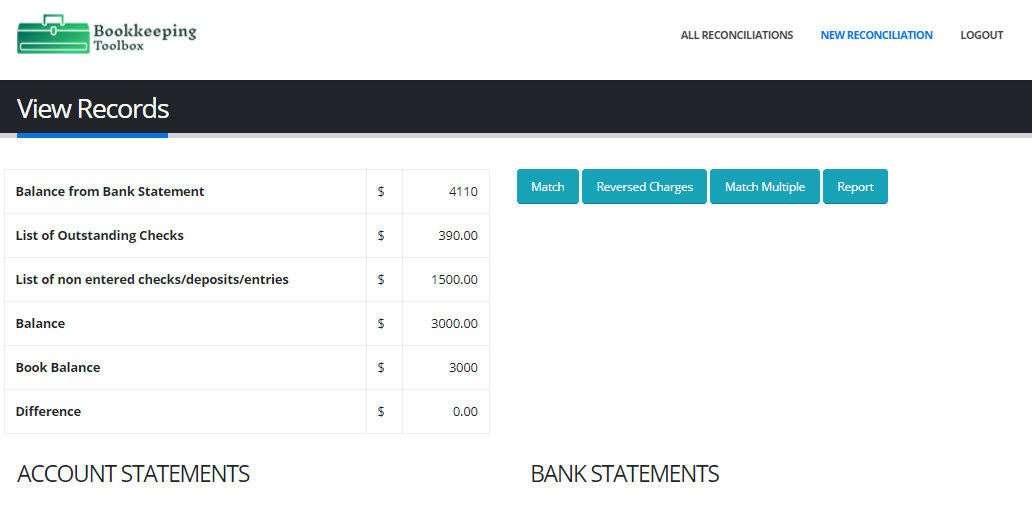
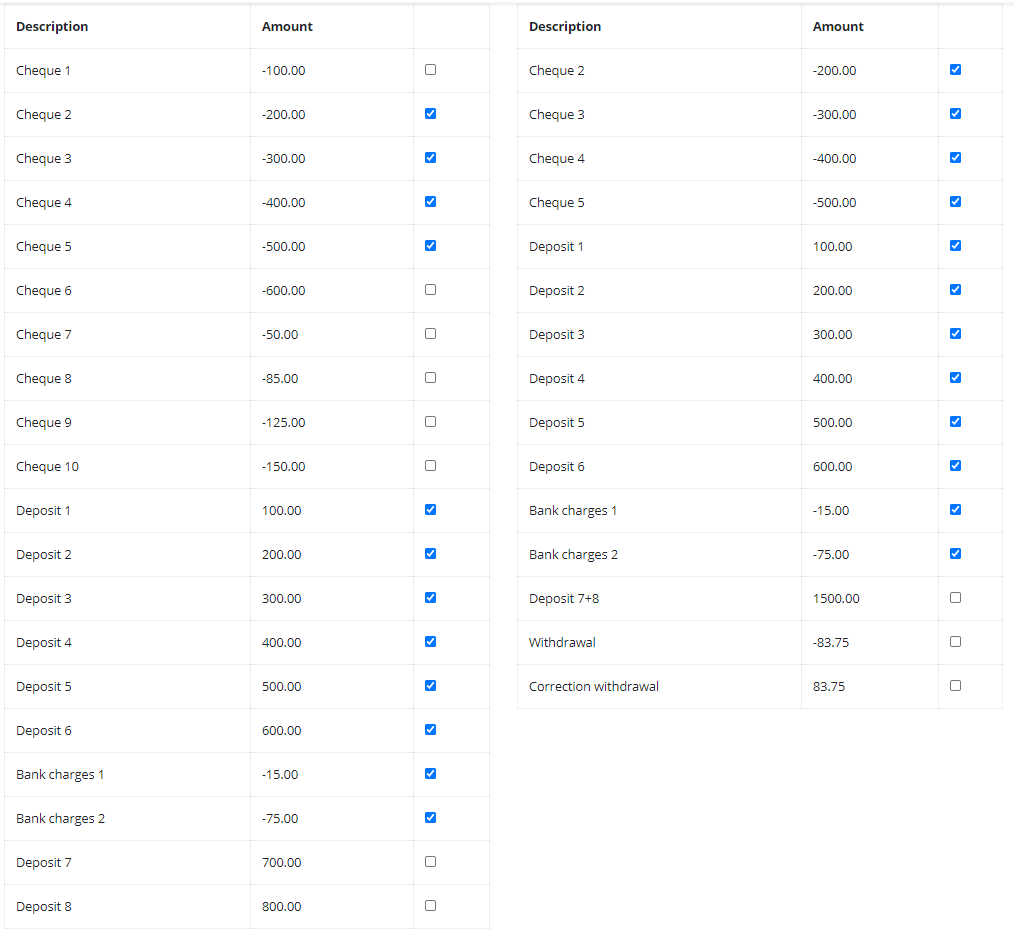
Our Automated Bank Reconciliation Software matched the exact entries from the bank entries with the corresponding accounting entries.
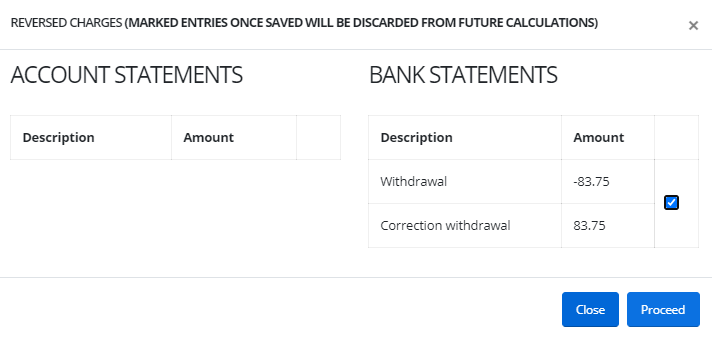
You can check for reversed charges by clicking ![]() . This will open a new window and look for two entries amounting to zero in the accounting entries or in the bank entries. Click
. This will open a new window and look for two entries amounting to zero in the accounting entries or in the bank entries. Click ![]() to select and click the proceed button
to select and click the proceed button ![]() to accept.
to accept.
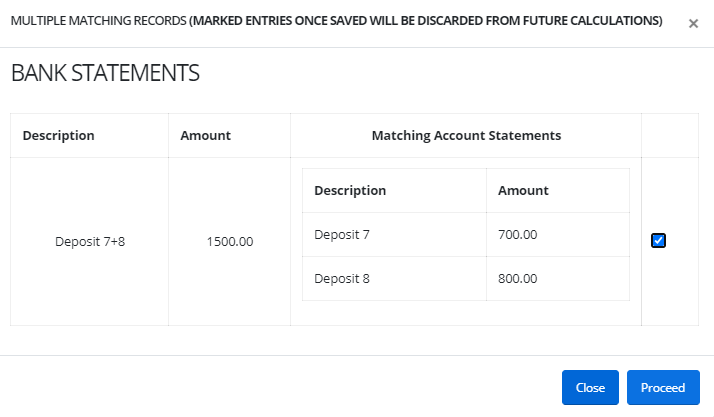
You can check for multiple accounting entries in that add up a one bank entry by clicking ![]() . This will open a new window and look for multiple accounting entries amounting to one bank entry or vice versa. Click
. This will open a new window and look for multiple accounting entries amounting to one bank entry or vice versa. Click ![]() to select and click the proceed button
to select and click the proceed button ![]() to accept.
to accept.
Once this is done and you are finished, click on report ![]() to print your reconciliation
to print your reconciliation
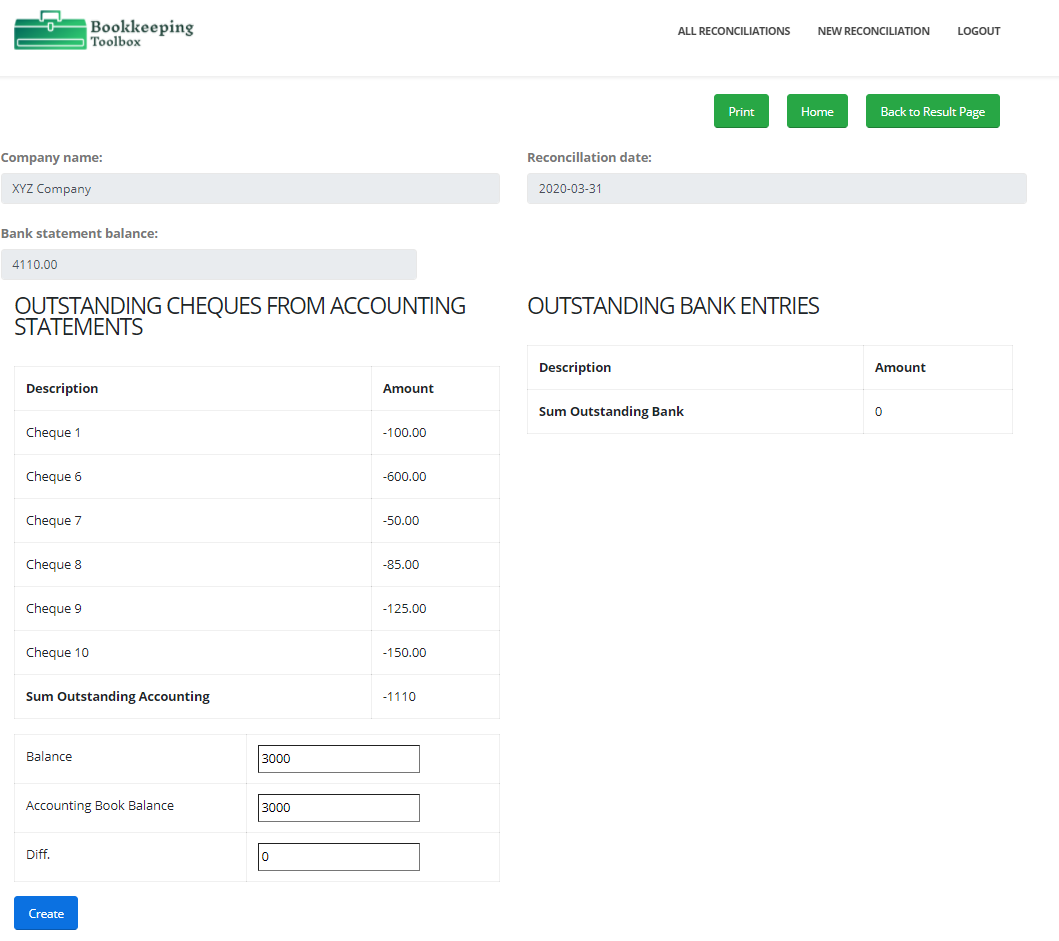
Click on the Home button ![]() to go back to your existing company list where your reconciliation has automatically been saved.
to go back to your existing company list where your reconciliation has automatically been saved.

You can search your reconciliations by company name, date or year. In this case we only have one therefore no sorting is necessary.
Here you have the option of opening an existing reconciliation by clicking the open button ![]() which brings you to the View Records page.
which brings you to the View Records page.
You have the option of editing an existing reconciliation by clicking the edit button ![]() which brings you to the Edit Company page, where you can modify account balances and entries, useful if you added missing entries and need to reconciliate again.
which brings you to the Edit Company page, where you can modify account balances and entries, useful if you added missing entries and need to reconciliate again.
You have the option of deleting an existing reconciliation by clicking the delete button ![]() . You may need to delete a file if you want to start fresh from a previous carry forward.
. You may need to delete a file if you want to start fresh from a previous carry forward.
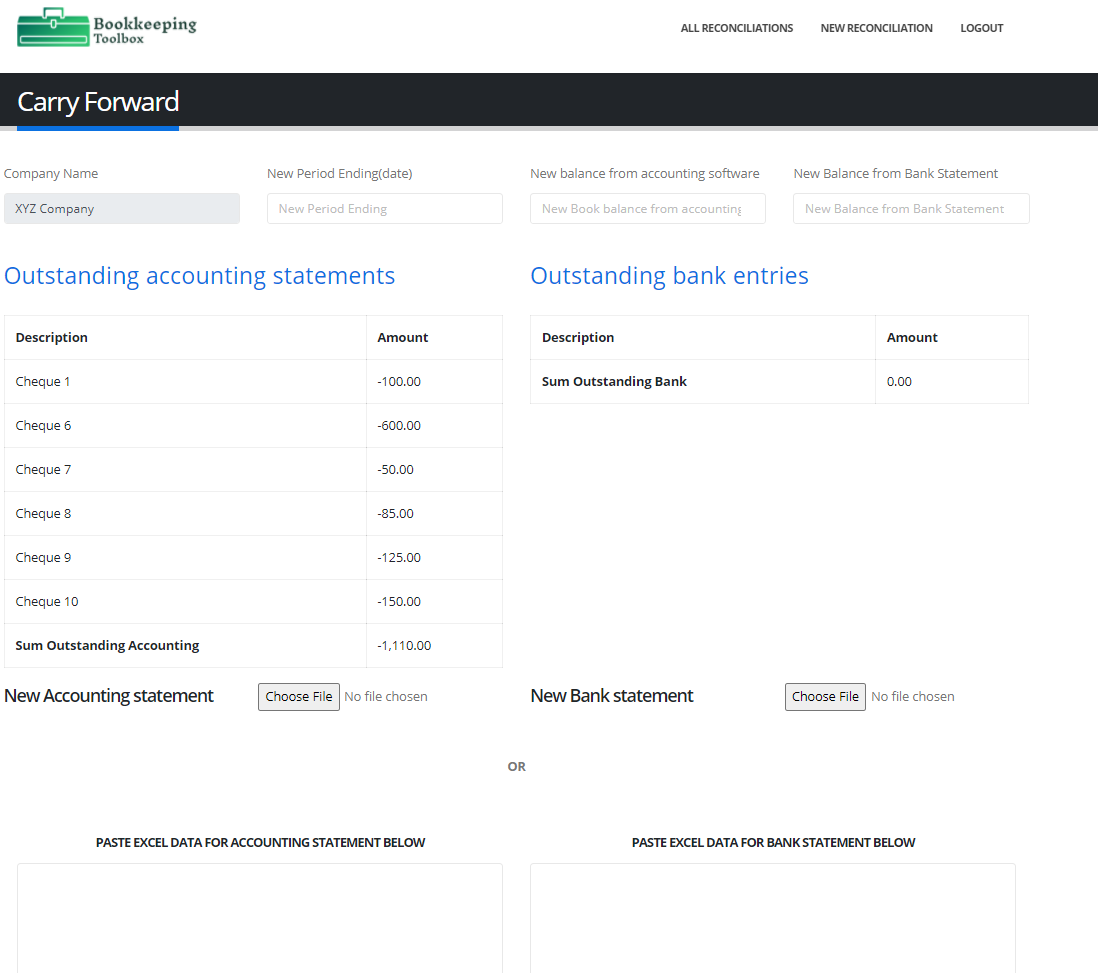
When you are ready to do a bank reconciliation for the next month, click on the Carry Forward button ![]() from the previous month in order to carry over the outstanding entries of your previous month to the next one. This brings you to the Carry Forward page where you will need to select a period, account balances and choose or paste accounting and bank entries like our example for a new reconciliation.
from the previous month in order to carry over the outstanding entries of your previous month to the next one. This brings you to the Carry Forward page where you will need to select a period, account balances and choose or paste accounting and bank entries like our example for a new reconciliation.
